There’s nothing quite like the vibrant taste of freshly squeezed orange or grapefruit juice to kickstart your day. That sweet, tangy goodness is pure sunshine in a glass. But then comes the aftermath: the sticky, pulpy mess left behind. Knowing exactly How To Clean A Citrus Juicer can feel like a chore that stands between you and your healthy habit. But what if I told you it’s easier than you think? Forget the dread of scrubbing and soaking. As the voice behind Citrus JuicerR, I’ve cleaned more juicers than I can count, and I’m here to turn this task from a sticky nightmare into a simple, two-minute ritual. Let’s get that machine sparkling clean and ready for its next zesty adventure.
Why Bother with a Squeaky-Clean Juicer?
“Can’t I just rinse it quickly?” I hear this all the time. While a quick rinse is better than nothing, a proper clean is non-negotiable for a few key reasons. Think of it as a little TLC for your favorite kitchen gadget.
- Taste Perfection: Leftover pulp and citrus oils can turn rancid, leaving your next glass of juice with a funky, bitter aftertaste. A clean machine ensures every glass tastes as fresh as the first.
- Hygiene is Health: Sticky sugar residue is a playground for bacteria and mold. You definitely don’t want that in your morning health boost.
- Machine Longevity: Citrus acid is, well, acidic! Over time, it can degrade plastic and stain components. Pulp can also clog up the works, putting a strain on the motor of an electric juicer. Regular cleaning protects your investment.
Gather Your Cleaning Arsenal
The good news? You don’t need a hazmat suit or fancy chemicals. Everything you need is likely already under your kitchen sink.
- Warm water
- Mild dish soap
- A soft sponge or non-abrasive scrub brush (an old toothbrush is perfect for nooks and crannies)
- A soft, dry cloth
- Baking soda and white vinegar (for deep cleaning missions)
The Ultimate Guide on How to Clean a Citrus Juicer
Ready to make your juicer shine? Follow these simple steps right after you’ve enjoyed your juice. The key is immediacy—don’t let that pulp dry and turn into cement!
- Safety First: Unplug and Disassemble
Before a single drop of water touches your machine, if it’s electric, unplug it from the wall. No exceptions. Then, carefully take the juicer apart. This usually means removing the reamer (the cone), the strainer or filter, and the juice collector or pitcher. - The Golden Rule: The Immediate Rinse
Take all the removable parts to the sink and give them a thorough rinse under warm running water. This one step will wash away about 90% of the pulp and sticky residue before it has a chance to dry. Trust me, this is the biggest game-changer. - A Little Soapy Soak
Fill your sink or a basin with warm water and a few drops of mild dish soap. Let the disassembled parts soak for a few minutes. This will help loosen any stubborn bits of pulp that the initial rinse missed. - Scrub-a-Dub-Dub: Tackling the Grime
Using your soft sponge or brush, gently scrub each component. Pay special attention to the mesh of the strainer, as this is where pulp loves to hide. That old toothbrush I mentioned? It’s your secret weapon for getting into the grooves of the reamer and any other tight spots. - Wipe Down the Base
This is critical for electric models. The motor base should never be submerged in water. Simply take a damp cloth (with a tiny bit of soap if needed) and wipe down the exterior. Be sure to clean up any drips or splatters. Dry it immediately with a separate dry cloth. - Dry, Reassemble, and Admire
You can either let the parts air-dry on a dish rack or wipe them dry with a clean towel to prevent water spots. Once everything is completely dry, put your juicer back together. Voilà! It’s clean, pristine, and ready for your next juicing session.
A Note from the Expert: I learned the hard way that letting pulp dry is a recipe for disaster. I once left a juicer after a late-night juicing session, thinking “I’ll get to it in the morning.” The next day, I spent 15 minutes chiseling off what felt like concrete-pulp. Now, I live by the 60-second rinse rule, and it has saved me hours of scrubbing.
Handling the Tough Stuff: Deep Cleaning Hacks
Even with regular cleaning, your juicer might need a little extra love every once in a while to tackle stains or lingering odors.
How Do You Get Rid of Stains and Funky Smells?
For tough stains or a lingering citrusy smell that’s gone a bit… off, natural cleaners are your best friend. Create a paste using baking soda and a little water. Apply it to the stained areas, let it sit for 15-20 minutes, and then gently scrub it off. For odors, a soak in a solution of one part white vinegar to two parts water for about 30 minutes works wonders. Just be sure to rinse thoroughly afterward to remove any vinegar scent.
What About the Dishwasher? Is It Safe?
This is one of the most common questions we get. The short answer is: maybe. Many modern citrus juicers have parts that are top-rack dishwasher safe. However, you must check your user manual first. High heat can warp some plastics. If you’re unsure, it’s always safer to hand-wash. The motor base, of course, should never go anywhere near the dishwasher.
Cleaning Different Types of Citrus Juicers
While the basic principles are the same, the specifics of how to clean a citrus juicer can vary slightly depending on the type you own. Whether you’re a fan of manual labor or electric efficiency, we have you covered. For a full breakdown, check out our guide on choosing from the best citrus juicers on the market.
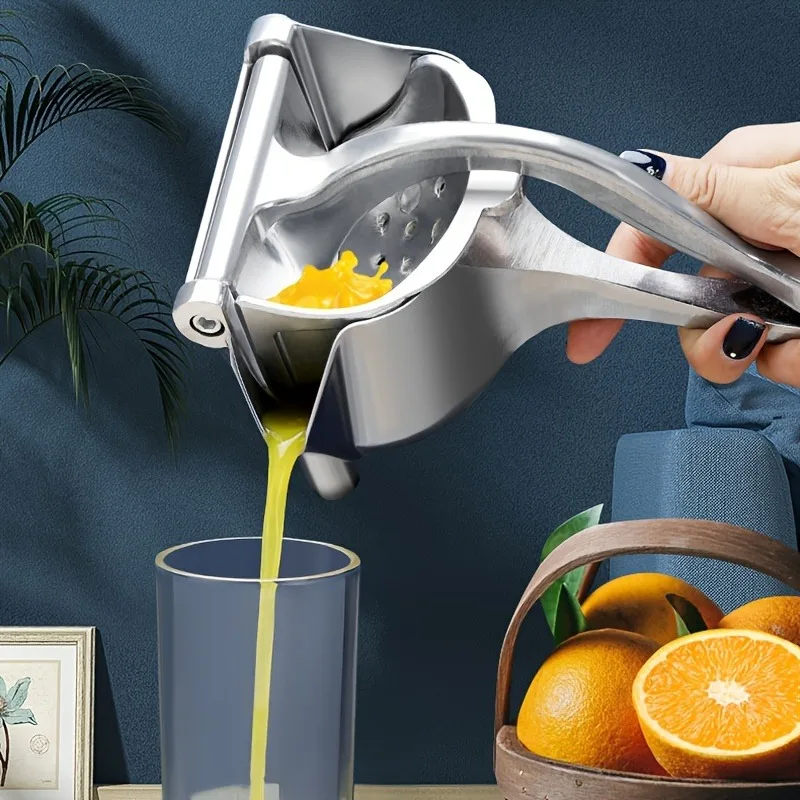
Manual Hand-Press Juicers
These are often the simplest to clean. The cone and funnel components usually lift right out. Just rinse, wash with soapy water, and dry. The heavy base just needs a quick wipe-down.
Electric Reamer Juicers
This is the most common type and the one our step-by-step guide is perfect for. The key is the separation of the washable parts (reamer, filter, pitcher) from the electric base.
Centrifugal or Masticating Juicers
While not exclusively for citrus, many people use these more powerful machines for it. They have more complex parts, including a mesh screen, blades, and a pulp ejection chute. Disassembly is more involved, and it’s crucial to follow the manufacturer’s cleaning instructions to the letter. Most come with a specialized brush for the screen, which is essential for proper cleaning.
Frequently Asked Questions (FAQ)
How often should I clean my citrus juicer?
You should clean it immediately after every single use. This prevents pulp from drying, stops bacteria from growing, and keeps your juicer in top condition. A quick clean takes only a couple of minutes.
Can I use bleach to clean my juicer?
Absolutely not. Bleach is a harsh chemical that can damage the plastic and metal components of your juicer. It can also leave behind a residue that is unsafe to ingest. Stick to mild dish soap, baking soda, and vinegar.
What’s the best way to remove sticky citrus residue?
A soak in warm, soapy water is usually enough. If the residue is particularly stubborn, let it soak for 10-15 minutes before scrubbing. The enzymes in the soap will break down the sticky sugars.
My juicer still smells funny after cleaning, what should I do?
A vinegar soak is your best bet. Mix one part white vinegar with two parts water and let the removable parts soak for 30 minutes. The acetic acid in the vinegar is excellent at neutralizing persistent odors. Rinse thoroughly afterward.
Are all citrus juicer parts dishwasher safe?
No, not all of them. Always consult your juicer’s instruction manual. If it confirms parts are “top-rack dishwasher safe,” you’re good to go. If in doubt, always opt for hand-washing to prevent damage.
A Clean Juicer is a Happy Juicer
Mastering how to clean a citrus juicer is the final step in embracing a truly fresh and healthy lifestyle. It’s not a daunting chore but a simple ritual that ensures every glass of juice you make is pure, delicious, and good for you. By following these easy steps, you protect your machine, your health, and the incredible flavor of your juice. So go ahead, squeeze the day, and enjoy the zest—cleaning up is now the easiest part.