A busy morning ritual often includes the fresh, vibrant taste of homemade juice. Yet, this satisfying experience can quickly turn frustrating when your juicer’s reamer cone—the very heart of your citrus juicing—becomes stubbornly stuck. Whether it’s dried pulp, accumulated residue, or simply a tight fit, a jammed reamer cone prevents you from enjoying your healthy beverage and can even damage your appliance. Understanding why this happens and knowing the right steps to safely dislodge it is key to maintaining your juicer and ensuring countless glasses of fresh juice. This guide will walk you through effective solutions and preventative measures, turning juicer frustrations into smooth, effortless operation.
Why Your Juicer’s Reamer Cone Gets Stuck
Several common culprits are behind a stubbornly stuck reamer cone, primarily stemming from the nature of juicing itself and how we interact with our appliances.
Pulp and Fiber Buildup
Table is empty.One of the most frequent causes is the accumulation of pulp and fibrous material, especially after juicing ingredients like celery, ginger, or leafy greens. These fibers can weave themselves into tight spaces around the reamer and auger, creating resistance and literally gluing components together. When juicing high-fiber produce, particularly with slow juicers, pulp can compact under the auger, generating upward pressure that clamps the reamer in place.
Dried Juice Residue
Juice, particularly citrus, contains natural sugars and sticky compounds. If the juicer is not immediately disassembled and cleaned after use, these residues can dry and harden, acting like a powerful adhesive that binds the reamer cone to the main juicing chamber or auger. This “juice glue” becomes incredibly difficult to budge once set.
Suction Effect
In some juicer designs, especially vertical slow juicers, a vacuum or suction effect can occur within the juicing chamber as pulp and juice are processed. This pressure difference can effectively seal the reamer cone to other parts, making it extremely difficult to twist or pull apart. Overfeeding the juicer or allowing too much pulp to build up can exacerbate this suction.
 A close-up view of a juicer's reamer cone stuck with dried pulp and juice residue.
Overtightening or Improper Assembly
While less common for reamer cones themselves, overtightening the locking ring or other components during assembly can contribute to a tighter-than-intended fit, making disassembly challenging. Similarly, if parts aren’t aligned perfectly during assembly, they might become wedged when pressure is applied during juicing.
Essential Tools for Troubleshooting
Before you begin, gather a few simple tools that can aid in safely dislodging your stuck reamer cone. You typically won’t need specialized equipment, but having these items on hand can make the process much smoother:
- Rubber Gloves: Provide a better grip and protect your hands.
- Damp Cloth or Sponge: For cleaning sticky residue.
- Gentle Prying Tool: A sturdy plastic spatula, a butter knife, or even a wine opener can be used with extreme caution to gently pry. Avoid sharp metal tools that could scratch or damage plastic parts.
- Warm Water and Mild Soap: For soaking and cleaning.
- Food-Grade Lubricant (Optional): A tiny drop of cooking oil (like olive, coconut, or almond oil) can be helpful for lubrication after cleaning and before reassembly, not typically for freeing a stuck part.
Step-by-Step Guide to Free a Stuck Reamer Cone
Safety is paramount when dealing with any appliance. Always unplug your juicer before attempting to dislodge a stuck reamer cone or any other part.
Method 1: The Reverse Switch Technique
This is often the first and safest method to try, especially if you suspect pulp buildup or suction.
- Unplug the Juicer: Ensure it’s completely disconnected from power.
- Plug Back In (Briefly): For some juicers, the reverse function only works when plugged in.
- Engage Reverse: Turn the juicer on and immediately switch it to the “reverse” setting. Hold it in reverse for about 20-30 seconds. This action helps to push the pulp backward, relieving pressure and breaking suction.
- Add Water (Optional for stubborn clogs): If the reverse function alone doesn’t work, unplug the juicer again. Pour a small amount of warm water into the feeding chute, enough to cover the auger. Plug it back in and run it in reverse for 20-30 seconds. The water can help soften dried pulp.
- Attempt Removal: Unplug the juicer once more. Gently twist the reamer cone counter-clockwise and try to lift it.
Method 2: Twist and Push Down
If the reverse function provides some relief but the reamer is still tight, this technique can help address upward pressure from compacted pulp.
- Unplug the Juicer.
- Apply Downward Pressure: Place both hands firmly on the top of the reamer cone or the attached juicing chamber.
- Twist Counter-Clockwise: While applying downward pressure, simultaneously twist the reamer (or the entire top assembly, depending on your juicer’s design) counter-clockwise. The downward force helps to compress any pulp that might be creating upward pressure, allowing the parts to unlock. This method often requires significant but steady force.
Method 3: Gentle Prying to Break Suction
Use this method with extreme caution and only if other attempts have failed, as it carries a risk of damaging plastic parts.
- Unplug the Juicer.
- Identify Gaps: Look for a tiny gap between the reamer cone and the juicing chamber or where the reamer connects to the auger.
- Careful Prying: Insert a thin, sturdy plastic tool (like a plastic spatula or a credit card) or a butter knife into the gap. Gently twist or lever the tool to create a slight separation. The goal is to break any suction or dried juice seal. Avoid excessive force that could crack or deform the plastic.
- Rotate and Repeat: Move the prying tool around the circumference, applying gentle pressure at different points, while simultaneously trying to twist the reamer cone counter-clockwise.
Method 4: Warm Water Soak (for dried residue)
This method is effective for dissolving hardened juice residue.
- Unplug the Juicer and Disassemble What You Can: Remove any easily detachable parts.
- Soak the Stuck Assembly: If the reamer is stuck with the auger or part of the chamber, submerge the entire stuck assembly in a basin of warm (not boiling) soapy water for 30 minutes to an hour. The warm water will help soften and dissolve the dried juice.
- Attempt Removal: After soaking, try Method 1 or 2 again. You might find that the parts now separate much more easily. For particularly stubborn residue, you may need to let it soak longer or gently clean visible sticky areas (see Method 5).
Method 5: Cleaning Sticky Areas
Sometimes, it’s not internal pulp but external sticky residue locking parts together.
- Unplug the Juicer.
- Locate Sticky Gunk: Inspect the seams where the reamer cone connects to the auger or the juicing chamber. Look for any visible dried juice or sticky film.
- Wipe and Rub: Dampen a cloth or paper towel with warm water, possibly with a tiny amount of mild dish soap. Carefully rub and wipe away any sticky gunk around the connection points. This can be surprisingly effective at releasing the grip of dried juice.
- Attempt Removal: Once cleaned, try twisting the reamer cone again.
Advanced Troubleshooting Tips
- Patience and Repetition: Sometimes, a stuck reamer requires a combination of methods and a bit of patience. Don’t force it immediately; try a method, wait a few minutes, and try again or switch to another technique.
- Temperature Contrast (Limited Use): For metal components that are stuck due to thermal expansion, applying a hot towel to the outer part and a cold pack to the inner part can sometimes help. However, use extreme caution with plastic juicer parts, as rapid temperature changes can cause warping or cracking. This is generally not recommended for reamer cones unless specified by the manufacturer.
Preventing Your Reamer Cone from Getting Stuck Again
Prevention is always better than cure. By adopting a few simple habits, you can significantly reduce the chances of a stuck reamer cone.
Immediate Cleaning
The golden rule of juicer maintenance: Disassemble and clean your juicer immediately after every use. Don’t let juice or pulp sit and dry. A quick rinse under warm running water is often all that’s needed if done promptly. For more thorough cleaning, use a brush to scrub pulp screens and crevices.
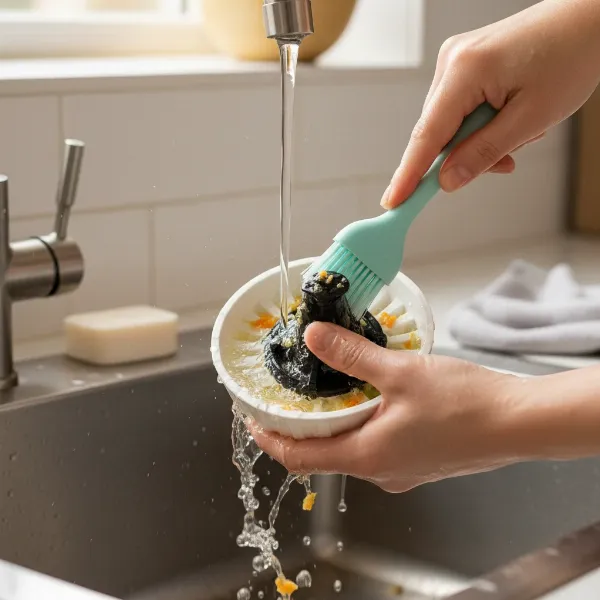 Hands cleaning disassembled juicer parts under running water to prevent future sticking.
Proper Produce Preparation
- Cut Fibrous Ingredients: Always cut fibrous produce like celery, ginger, and pineapple into smaller, manageable pieces (1-inch chunks or shorter strings). This prevents long fibers from tangling around the auger and reamer, reducing the likelihood of clogs and buildup.
- Alternate Ingredients: When juicing a lot of fibrous produce, alternate it with softer, juicier fruits to help push the fibers through.
Mindful Juicing
- Don’t Overfeed: Avoid pushing too much produce into the juicer at once. Give the machine time to process the ingredients. Overfeeding can lead to pulp backup and pressure buildup.
- Use the Pusher Gently: If your juicer comes with a pusher, use it only to guide ingredients, not to force them down. Let the juicer’s mechanism do the work.
Regular Maintenance and Lubrication
After thoroughly cleaning and drying, consider applying a tiny drop of food-grade cooking oil (like coconut oil or olive oil) to the gaskets, O-rings, or any plastic-on-plastic contact points before reassembling. This creates a thin barrier that prevents juice from sticking and allows parts to slide together and apart more easily. Use very sparingly to avoid making parts greasy or attracting dust.
Thorough Drying
Ensure all components are completely dry before reassembling your juicer. Moisture can combine with residual sugars to create sticky conditions, and it can also promote bacterial growth. Air drying or wiping with a clean cloth is essential.
When to Seek Professional Help or Consider Replacement
While most stuck reamer cones can be freed with the methods above, there are times when it’s best to consult an expert or consider a replacement. If you’ve tried all the recommended steps and the reamer remains firmly stuck, or if you notice any signs of damage (cracks, bending, stripped plastic) from your attempts, it might be time to:
- Contact Customer Support: Reach out to the juicer manufacturer’s customer service. They may offer specific troubleshooting tips for your model, advice on spare parts, or even warranty coverage for faulty components.
- Consult a Repair Professional: For high-end juicers, a small appliance repair shop might be able to help, though this can sometimes be more costly than replacing the part.
- Replace the Part: If a specific component, like the reamer cone or auger, appears damaged or warped, replacing that individual part is often a cost-effective solution compared to buying a whole new juicer.
Conclusion
A stuck reamer cone doesn’t have to be a permanent roadblock to your juicing routine. By understanding the common causes—primarily pulp buildup, dried juice, and suction—and applying the right gentle techniques, you can often free the component with minimal effort. Remember to prioritize safety by unplugging your machine, and always start with the least invasive methods like the reverse switch and gentle twisting. Most importantly, adopting good habits such as immediate cleaning, proper produce preparation, and mindful juicing will prevent future sticking, ensuring your juicer remains a reliable partner in your quest for fresh, healthy beverages. What steps will you take today to keep your juicer running smoothly?
Frequently Asked Questions
Can I use harsh chemicals or strong detergents to loosen a stuck reamer?
No, it is generally not recommended to use harsh chemicals, strong detergents, or abrasive cleaners on juicer parts. These can damage the plastic or rubber components, affect the food-grade safety of your juicer, and potentially leave residues that could contaminate your juice. Stick to warm water and mild dish soap.
How often should I clean my juicer to prevent sticking?
Ideally, you should clean your juicer immediately after every single use. This prevents juice and pulp from drying and hardening, which is the primary cause of stuck parts. If you can’t clean immediately, at least rinse the juicing components under warm water to remove loose pulp and juice.
Is it safe to force a stuck reamer with extreme strength?
No, it is not safe to use excessive force or leverage tools aggressively on a stuck reamer. Doing so can easily crack, break, or strip the plastic components of your juicer, rendering them unusable or compromising the integrity of the appliance. Always apply gentle, steady pressure and try different methods.
What types of juicers are most prone to a stuck reamer cone?
Vertical slow juicers (also known as masticating or cold press juicers) tend to be more prone to parts getting stuck, including the reamer cone or entire juicing chamber. This is often due to the way they process fibrous produce and the potential for pulp buildup and suction within their compact designs. Centrifugal juicers are less commonly affected by this specific issue.
What if the entire juicing chamber is stuck, not just the reamer?
If the entire juicing chamber (which often includes the reamer and auger as a combined assembly) is stuck to the motor base, similar principles apply. Try running the juicer in reverse for 20-30 seconds (if your model allows), gently wiggling the chamber while twisting it counter-clockwise, or soaking the stuck assembly in warm soapy water to loosen dried residue.